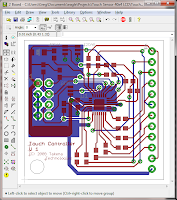
But the user interface is arcane. It takes me a day to remember how to use the darn thing when I haven't used it for a couple months. Yesterday, I spent 2 hours on a 1 page schematic. That was easily twice what it should have taken, but I was re-learning the UI.
The way to operate on groups always confuses me at first. But it is actually fairly straight forward, if not intuitive.
1. Select (that is click on) the operation you want to do. Move, delete, copy are the common ones I use on groups.
2. Select the group operation - the dotted box icon.
3. Drag select the group of items you want to operate on. An object must be completely contained within the box to be selected as part of the group.
4. Right click any highlighted object in the group. At the bottom of the pop-up menu, there will be a menu item for the group operation you selected before you activated the group command.
Like I said, straight forward but not intuitive.One would expect the menu to be group commands if you have a group selected. But that is not how it works.
 I am doing a very small SMT board design based on the Atmel AT42QT2160 touch controller. I chose a board outline that was a little tight. Being "a little tight" on space doubled the amount of time it took me to do the layout. And being out of practice with Eagle CAD probably doubled the time again. So it took me several hours to do a small, fairly simple board.
But now I'm mostly back up to speed on the interface and re-memorizing the hotkeys, and I will try not to make the mistake of constraining the next board to just barely big enough for the next three boards I need to do for the contest.
It's not that my design is so complex it needs four boards, but free Eagle CAD is limited to small boards, and I wanted to modularize the design for re-use. Also, if one of the boards needs a major redesign, it should be easier and cheaper to revise one smaller board than one big monolithic design.
One note on the Atmel touch controller. The pins are arranged fairly nicely, except I have no idea why they thought it would be a good idea to put X6 and X7 on the opposite side of the chip from the other six sense lines. That really isn't helpful, and complicated the layout quite a bit. I'm considering ripping up those routes and using just 6 sense lines, which would give me 6 buttons and a slider. Who needs 16 buttons anyway?

No comments:
Post a Comment